Haircare, Hair Science, Styling
USING STRAIGHTENING IRONS
 How To Use Those Very Hot Irons Properly!
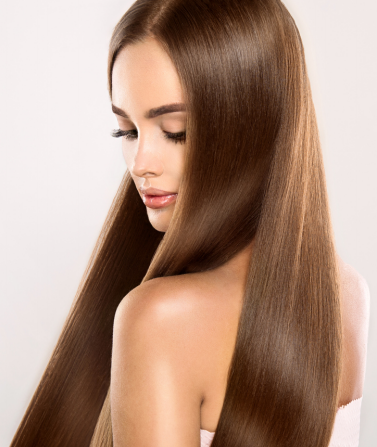
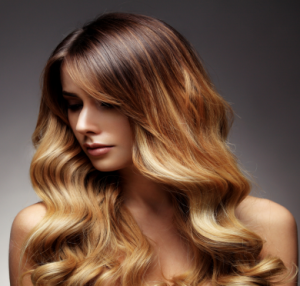
Sleek, shiny, straight hair can make a major impact. It’s the kind of style that somehow manages to look chic with everything from a great dress to your lazy Sunday sneaks and joggers, and it works at every hair length. Want to get the look? We talked to My Hair Doctor’s Guy Parsons to find out exactly how to straighten hair like a pro. From prep work in the shower to finishing touches, these rules of thumb give you the best way to straighten hair without causing unnecessary damage (we are working with high heat, after all!).
1. Prep for Straight Hair in the Shower
Let’s get one thing clear: no shampoo or conditioner will give you straight hair. But hair care items labeled “smoothing” may be able to help prepare the strands for the process by providing major moisture. Hair that’s dried out and brittle before you even start with the straightener is the culprit behind frazzled hair that won’t lie flat. “Take a paddle brush to comb the conditioner through,” suggests Guy , “then rinse your hair gently. Once you’re out of the shower, don’t towel dry like crazy! That will enhance the natural curl. Instead, pat downwards gently.” As an alternative to the traditional terrycloth towel, which promotes frizz, try a microfiber material that helps to promote sleek strands.
2. Rough Dry Your Hair
“The blowdryer is what’s really the most damaging to the hair,” says Guy. “So that makes all the difference when you’re trying to get a sleek finish.” If you do use a dryer out of the shower, Guy also suggests rough drying (which is a technical term for shaking the dryer back and forth over the head) until it’s 80% finished. “But it’s important to keep the nozzle facing downwards the entire time, otherwise the hair will frizz,” he notes. The next 20% is up to you: You can apply your product then let it air dry, or, “Blow it out smooth for the best result,” Guy says. “It gives the hair more direction and shape.”
3. Use the Right Brush
As for your brush, Guy insists on using a nylon and bristle mix: “Nylon would cause static on its own, which is why plastic brushes are difficult to use,” he explains. “The boar bristle helps to smooth and polish.
4. Wait Until Your Hair is Bone Dry
“If you see steam or you hear a sizzle, stop and evaluate the situation,” “Hair should be bone dry when you straighten.” If you’re certain that the hair is dry, it could be that product build-up is the culprit. “You need to be selective about what products you use before you flatiron,” insists Guy. “You should avoid applying anything to dry hair, which is what makes straightening different than curling. Because the iron clamps down on the hair, there’s nowhere for the product to go. You’re essentially boiling the product into the follicle, which isn’t a great idea, especially when it contains alcohol.”
 5. Use a Thermal Protectant
OK, so you don’t want the hair to sizzle. But how are you supposed to get runway-ready strands without the help of a little something? Try My Hair Doctor Everyday D-Tangle & Style Spray “You can use it on damp hair, which is great, and it protects up to 450 degrees and resists humidity, so it dramatically reduces the frizz factor.” Plus, it’s made without oils and silicones, which could ultimately weigh the hair down. If you have thicker or coarser hair, you could still use an argan oil such as my Hair Doctor Liquid Gold Hydrating Oil to help moisturize your hair and add more shine.
6. Monitor Your Temperature
Always protect your hair by avoiding too-hot temperatures. “The 450-degree setting was designed specifically for in-salon, professional keratin treatments,” Guy says. “It wasn’t meant for consumers. But now, everyone can use it, which makes the at-home process faster.” Obviously, this comes at the expense of your hair’s health. “Coarse hair does need a higher heat,”. “But fine hair and especially damaged or color-treated hair should stay in the safe zone of 300 to 350 degrees.”
7. Take It One Section at a Time
“You shouldn’t be randomly grabbing fistfuls of hair,” says Guy. “The iron won’t be able to get to pieces that are too thick, and you don’t want to unnecessarily reapply heat.” Instead, she suggests creating sections so you can easily track your progress: Split the hair in the middle at the back and then bring it forward. This will give you two sections to work with, but if your hair is thick, you may consider clipping it into four parts. Careful sectioning is one of the most key hair straightening tips. “Sectioning will save you time,” Guy adds. “The reason everyone complains about straightening taking so long is that they’re working off random bits of hair!”
8. Always Hold Your Hair Taut
If you keep your hair sections pulled taut, they’ll need less pass-throughs with the flat (and less passes mean less damage, of course). Passing over hair with the iron more than once won’t kill the hair, but you shouldn’t need to do it as much if you’re pulling your hair and creating tension. “Tension is essential,” Guy notes. “Create your tension, then pull the iron downward starting from the root.” Obviously, curly styles will find it necessary to pull, straighten, and repeat a few times, but pulling the hair taut while you straighten will help immensely.
9. Add Finishing Products to Reduce Frizz and Add Shine
If you have the kind of hair that may frizz or curl up, finishing products are your friends, not your enemies. But we’ve already learned to avoid silicones and oils, found in most shine agents, so what’s left? “A light hold hairspray is a good idea,” Guy says. “But it’s best to wait for the hair to cool down first. Think about spraying a hot pan — it’ll sizzle and steam. Your hair will do the same thing!” He suggests spraying a boar-nylon brush with product, then combing it through for even application. “It’s the best way to make sure your hair gets hold that isn’t sticky or stiff,” she notes.
 10. Use a Flat Iron with Advanced Technology
If you’re flat iron is a dinosaur, you could be following all of the above steps and still ending up with less-than-flawless hair. The truth is, when it comes to straightening, the proof is in the product. Here, our pro give you some compelling reasons to break the piggy bank for a good flatiron: “The automatic shut-off feature in T3 irons is crucial. It’s a great safety feature for the girl-on-the-go,” Guy says. “Look for the recovery time,”. “A lot of cheap flatirons take up to 90 seconds to recover the temperature you set, so you’re actually losing heat as you go along. That also means heat won’t be evenly distributed between the two plates.” “Material is important,” Guy adds. “Ceramic is softer on the hair, but that makes it ideal only for fine-to-normal hair types. If you have curly hair, look for gold or titanium.” As for size, it matters. “Never go above an inch-and-a-half,” Guy insists. “You won’t be able to reach the root properly.” Thicker irons can be good for styling, but not straightening.
11. Don’t Forget That Your flat Iron Can Do Double
Duty to Create Waves and Curls
Tim reminds us that use a flat iron can add texture and polish to any hair of any style or length. A flat iron, he says, can even work wonders when styling short hair. On top of that, flat irons can function as a curling iron and give you beachy waves or tousled curls.